Stabilizers Balance and Bows Oh My!
George Ryals
Stabilizers, balance, and bows - oh my!
By George Ryals IV ©2010
Stabilizers, over the last decade or so, have become all about vibration damping. Sales of stabilizers and the perceived quality of a stabilizer are measured by how dead it makes the bow feel. Vibration damping isn’t the most important thing stabilizers are for. While vibration reduction is nice, it doesn’t do anything for overall accuracy. For instance, in high speed video, it is easy to see that the arrow is ten yards in front of the bow by the time the punch of the shot is felt.
Stability improves accuracy is two ways. There is a mechanical improvement and a mental improvement. The mechanical improvement is just simple aiming stability. The tighter your hold is, the tighter your groups are going to be. That part is pretty easy to put your finger on. The mental improvement is less straightforward and it affects different shooters in different ways.
A stabilizer adds stability to the bow, your form relaxes and your bow becomes more still.
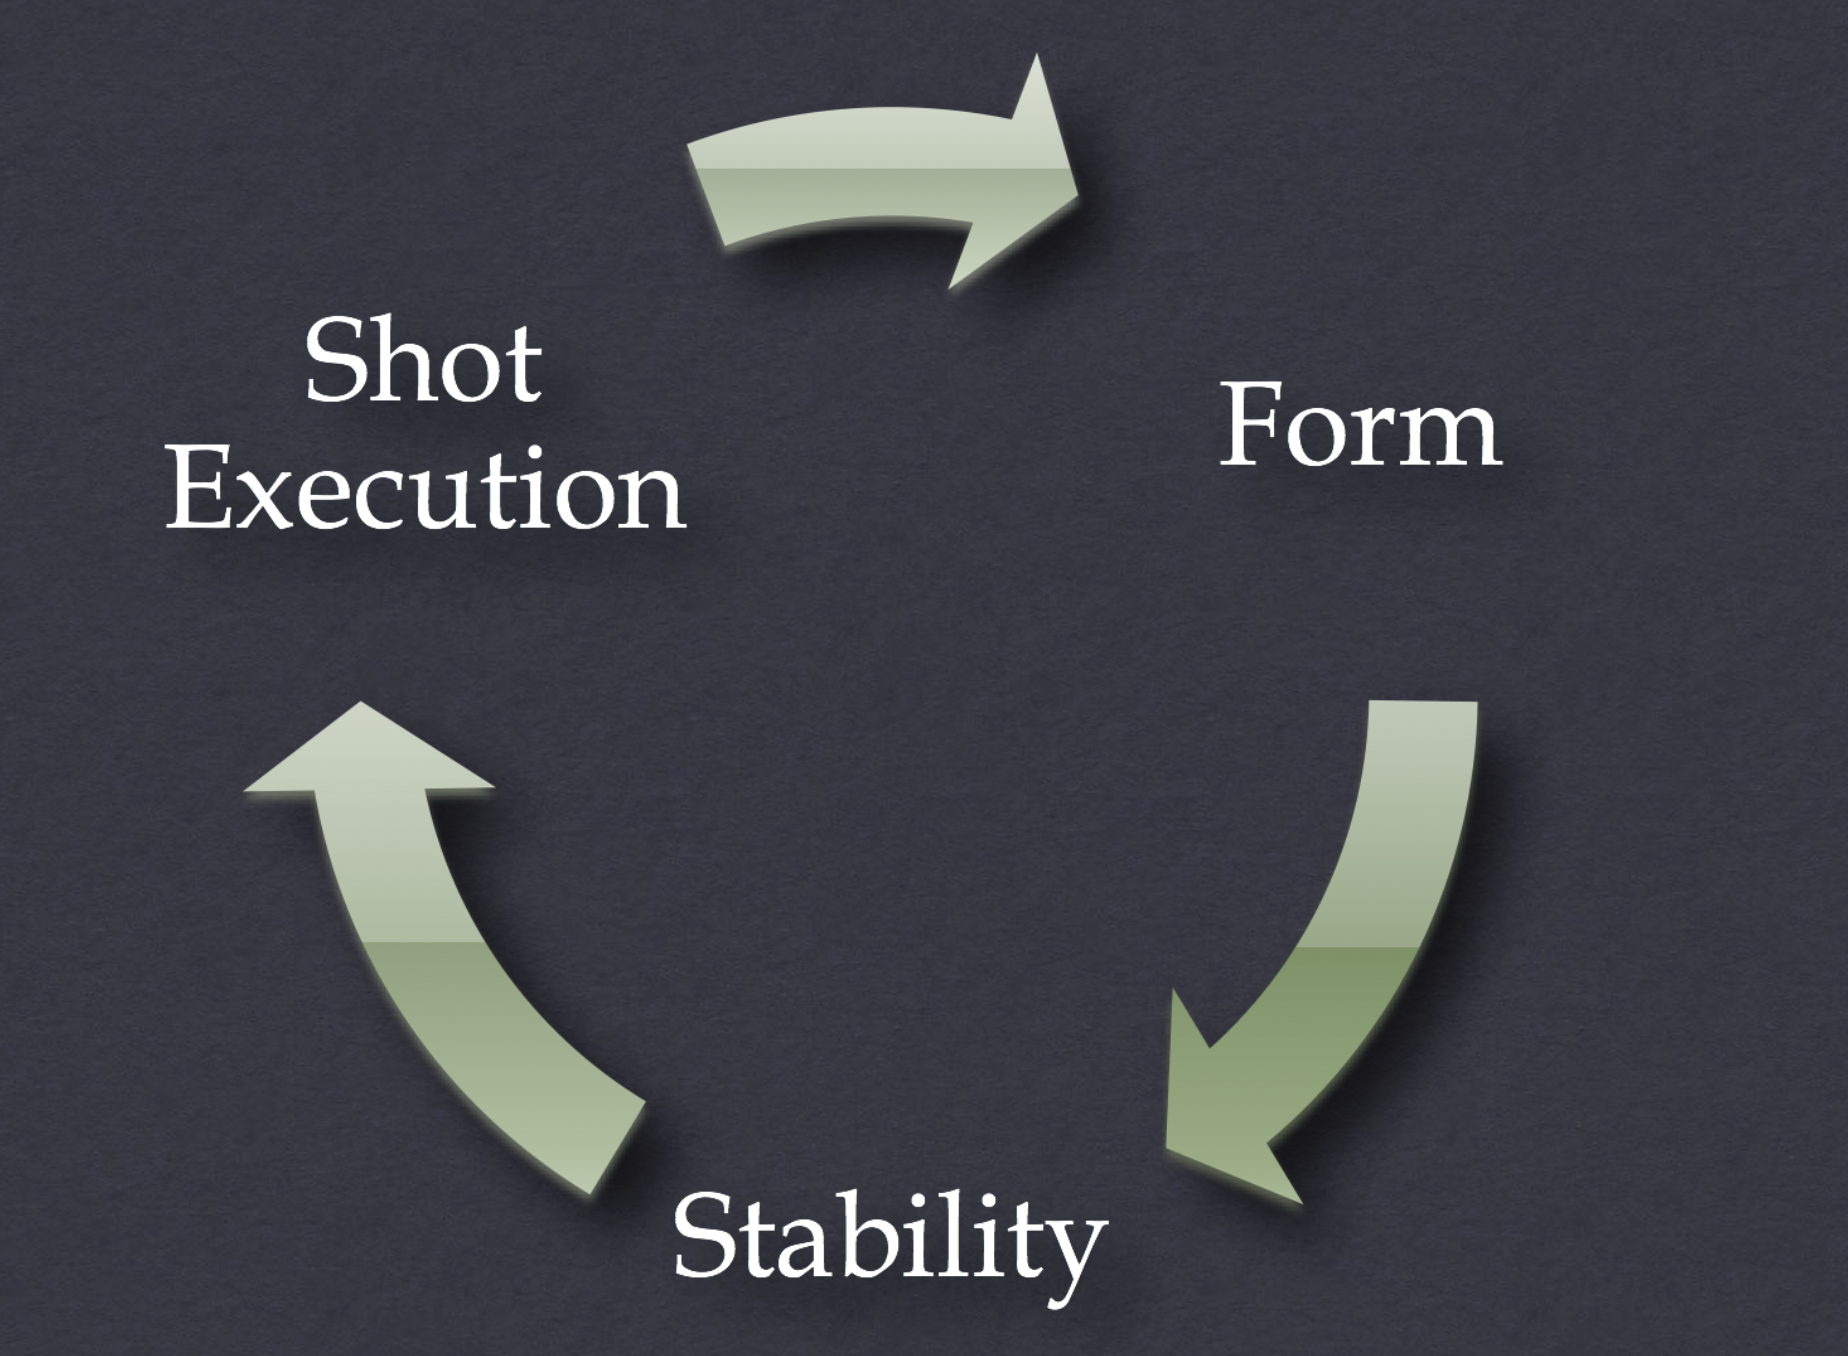
Stability, shot execution, and form are intrinsically connected to each other. If there is a problem in one area it creates problems in the other areas. It’s a cycle that feeds itself. You can give it positive input and see a cascading effect through all three parts of the shot cycle. It works something like this. A stabilizer adds stability to the bow, your sight picture moves more slowly, and covers less area on the target. Added stability allows you to relax a little mentally, and reduces the struggle to keep the dot centered. Your form and frame softens a little. You find it easier to hold the bow with a relaxed pressure and less use of opposing muscle groups. Hardness through your framework and muscles can create rigidity that causes a low frequency vibration in the bow that never really settles. Softening the bow movement with stabilizers and gaining better balance, helps the bow feel lighter and stay on target with less effort. The overall mental ease, form relaxation, and the stability it creates allows your shot execution to speed up. Soft, relaxed hands that are elongated under the pressure of your form give a more consistent and timely activation of the release. Your stabilizers are a seemingly simple part of your setup; who would have thought that you could fix so many things with a good stabilizer rig?
Though it doesn’t need to be said, negative input in any area of the cycle of stability, shot execution, and form can have the same cascading effect, but it’s the kind you don’t want. Without going into too much detail… Ever had a “worst day ever”? That’s what that negative input and its effects feels like.
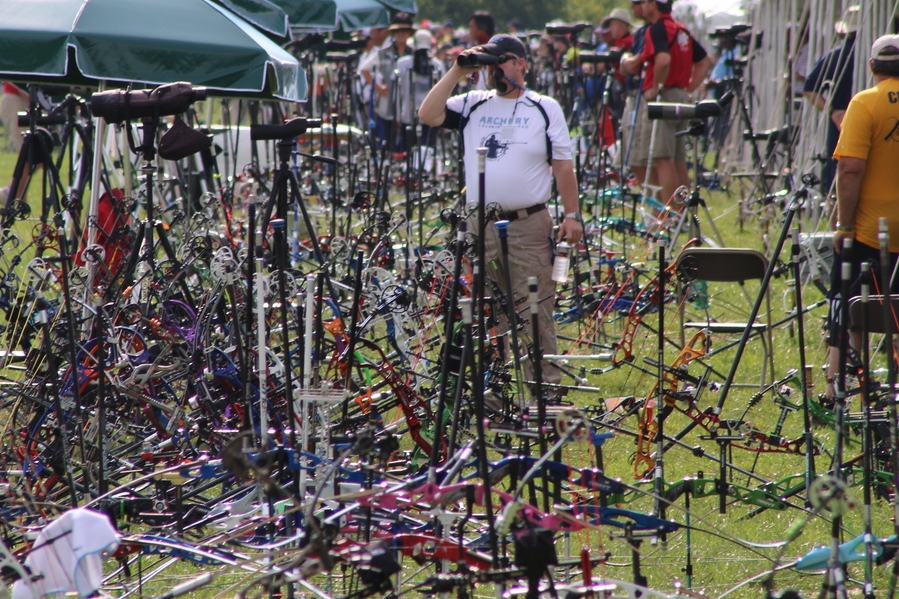
Form, and shot execution do play an equal role, but lets concentrate on stability; specifically, your stabilizer configuration. I see shooters all the time set up their new bows with just any old stabilizer rod. Many arbitrarily put weight against the riser, many use side rods or V-Bar kits, because everyone else uses them. Often I see people using the stabilizer rod with no weight on the end. You can’t swing a cat by the tail without hitting a stabilizer company these days. Everyone has a rod out now that promises to be the cure for everything under the sun. They all have their sales pitches and they all have a pretty good-looking product too. In fact some of the stabilizer setups walking around out there are quite beautiful, Ineffective in my opinion, but beautiful nonetheless. There is a lot of voodoo flying around concerning stabilizers, and the bulk of the people out there don’t really understand how it works or how to use the laws of stabilization to create the most effective setup.
Essentially the purpose of the stabilizer and adding weight to a bow is to raise its moment of inertia. Moment Of Inertia (MOI) is the measure of an object’s resistance to rotation. A high MOI is very resistant to torque. A low MOI is not resistant at all and is very unforgiving. The lower your moment of inertia, the more perfect you have to be. Your aim has to be perfect, your execution has to be perfect, and your form and muscle consistency has to be exact from shot to shot.
Good, well made, stabilizer setups most effectively raise your MOI. Your stabilizer needs to be as light as air and it needs to separate the most of its mass as far away from the bow as possible. The stabilizer also has to be rigid with almost no flex. Limber rods allow the bow to move through the flexible range of the rod before the mass of your stabilizer weights can have their greatest effect on rotation. There are many rods out there that are pretty stiff. The best way to check your rig is to just grab the rod in each hand and give it a bend. If you feel flex at all, it’s likely that your rod is allowing minor modifications to your aim after the release opens. Those shots that you feel are less than perfect end up just outside the line. The forgiveness that an ultra stiff rod can afford can keep those “just out hits” - “Just in”.
Often the weights on a stabilizer are separated from the rod with rubber or some other vibration damping material. This makes the bow feel great. However if the rubber is too soft it can allow movement of the system before the arrow can leave, you are reducing the effectiveness of the weight. Think about this for a second. If the weight is what keeps the bow still as it sits on a rigid rod, why would you separate that weight from the rod with a flexible mount?
Many Stabilizers are heavy overall through their entire length. Some have vibration-damping pistons; oil filled bladders, sand kits, and the like in the rear of the rod close to the bow. Though these vibration-damping modules do make the bow feel great by reducing much of the ringing vibration out of the bow, they do little or nothing to increase the forgiveness factor of the bow. Today’s bows are pretty heavy before you add anything to them at all, so when you add more weight with the idea of making the bow more forgiving and stable, you have to be sure the weight is located in the proper spot to give you the most forgiveness. Just mass weight alone doesn’t create accuracy. Mass and balance together will be most effective in reducing tremor and keeping the bow still while it cycles and launches the arrow.
When you are finding the balance that works for you there are several clues you can watch for. Keeping a close handle on the feel of the bow is a big part of your initial setup. You can also watch the shape, size, and speed of your sight on the target for valuable clues that point you to your next step toward perfect stabilization. The first step to get started is to take a look at your current setup. If you have any weight right against the bow, figure out how much it weighs and get rid of it. Weight right up against the bow resists transitional force on the bow.
Transitional resistance keeps the bow on the track your form puts it on. That does not mean that track will be straight with the X-ring
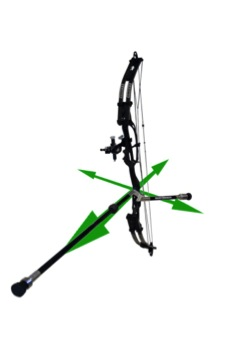
Transitional resistance keeps the bow traveling straight towards the direction you torqued it to. This doesn’t mean it’s straight to the target. It only means that it maintains whatever line you put it on. Transitional resistance doesn’t add forgiveness or accuracy unless your form is perfect. The overall mass weight that it adds to your bow may contribute to overall stability, but if it were on the ends of the rods it would add forgiveness, accuracy, and stability at the same time. The weight located out on the ends of the rods resist rotational forces. The resistance to rotational force will keep your bow still longer in the presence of torque or some other shooting error. This is where the rubber meets the road when you are trying to use stabilization to add accuracy.

Rotational resistance is imparted by the weight that is positioned out on the ends of the rods. This gives the bow forgiveness and accuracy
We’re going to move that weight that you removed from right against the bow out to the ends of the rod in a later step. For now, lets say you have a total of 14 ounces on your bow not including the rods themselves. If your rod has a heavy rear module, you will want to think about getting rid of the module. That weight right against the bow isn’t doing anything but making your bow heavy. You can move that weight from against the bow out to the ends of the rods where it has the most effectiveness.
First of all I want you to shoot your bow without any stabilization at all so you can get a feel for how it moves. Without stabilization you can see the effects of draw length issues, tension in your frame, or misalignments in your form. However that is a whole other article worth of information. Once you have shot your bow without rods you can watch the affects when you add the rod and weight. After adding the rods and no weight you should barely notice any change at all, though you will see a very slight balance change. While you are shooting the rods with no weight at all installed notice your sight movement and direction. You may also be able to see the side to side waggle in the rod at full draw as well.
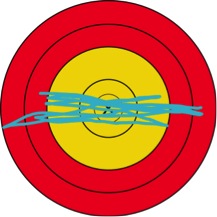
Waggle is the sharp side to side pattern in your stabilizer tip and sight movement. Relaxing the grip as much as possible or adding a little tip weight will clear this up.
You can reduce the waggle to some degree by relaxing your bow-hand more. Here is where you will add your first bit of weight. You will be paying close attention to the weight you add and how much it tames the waggle in the tip of your long rod.
Your long rod is the leverage in the system It will do the bulk of the correction. Your side rods are the balance to offset the leverage of the front rod. Imagine watching a tight rope walker with a very short stick. They will have to use more muscle to stay balance and will noticeably more wobbly as they walk the line. The longer the pole the tight rope walker has, the easier it is for them to relax and balance themselves. Now let’s say he has a 20’ pole and he is holding by one end. It would make it nearly impossible to walk the line because he is struggling with the weight and leverage of the pole. When he holds the pole in the center he can allow it to balance itself and use very little force and muscle.

The side rod can help vertical tilt and offset the leverage of the front rod. Great balance will make a heavy rig feel lighter.
Many people think the side rod is there to offset the weight of the sight. Though hanging the weight off to one side helps reduce the natural cant of the shooter. That cant isn’t really caused by the weight of the sight. The sight is so close to the center line of the bow, it would have to be very heavy to really have a significant effect on your bow balance. The cant or offset is really caused by your bow arm. The twin bones in your forearm are in a slightly coiled or in a twisted state to hold the bow upright. As you relax through the shot these bones begin to uncoil to parallel. You will want to add weight to your rear rod or rods to offset the leverage of your long rod. You can split this weight between two rods or put it all on one rod. Whatever feels best to you will work just fine.
The formula for finding the rear rod weight is Length x weight, or length of your long rod multiplied by the weight on its tip. You will then divide that number by the length of your rear rod. For example I have a 33” B-Stinger XL Premiere on my Hoyt Contender, and I have a 12 inch side rod. I have 5 oz on the end of my long rod, so 33” x 5oz = 165”oz. I will divide 165 by my side rod length (12”) and I arrive at 13.5oz. I just round up to 14oz because the B-Stinger weights come in one ounce increments. You may be thinking, “WOW, 14oz is a lot of weight.” If that weight is too much for you to hold up, you can use longer rods and reduce the weight. If I wanted the same leverage against torque but with lighter weight I can use the same formula. Currently I have 165”ounces. If I change my 33” stabilizer to a 40”, I can reduce the weight by an ounce and still have the same leverage. If I switch to a 15” side rod I can reduce the weight by 3 oz. A good rule of thumb to remember is “twice the distance, half the weight”

By offsetting the leverage of your long rod, you can create a basic balance like the tight rope walker. Though 14 oz sounds like a lot of weight, you will be amazed at how light that feels when it is in balance. The extra mass will reduce the effect of muscle tremor while you aim and preloaded torque as the arrow is launched. I recommend shooting as much weight as you can work up to as long as it is in balance.
Paying attention to your sight pattern as you aim gives will let you know when to make changes. The rules I am about to lay out for you are basic rules of thumb. As you learn more and are observant to changes in your hold pattern you may modify these rules based on your own shooting style.
Holding Weight Verses overall Mass weight – There has to be equilibrium or balance between your holding weight at full draw and the overall mass weight of your complete rig. If your overall mass weight of the bow is too light your hold pattern will be choppy and unpredictable. Light muscle tremor and slight bobbles will not be damped at all resulting in a hard sharp sight pattern. If you see a fast moving circular motion that tends to over-travel what you are trying to aim at, or it takes a long time to get the bow settled into a tight pattern your bow weight is too heavy or your holding weight is too light.

If you see a sharp sight pattern that never settles, you can decrease your peak weight or increase your overall mass weight.
A loose random float that never settles or tends to over-travel what you are trying to aim at, your bow is too heavy. Reduce overall bow weight or raise peak weight.
Directional float – once you get your balance feeling good and you get your overall mass weight feeling great, you can begin to fine tune the float. In some cases the leverage of the rod can change the hold pattern as you apply pressure through the shot. The dot in your scope may rise of bounce up as you aim, or it may sink or bounce down in a light bobbling motion. There is an easy fix for this. The rule of thumb is “if it pops up, move the weight forward. If it drops down move the weight back.” I do need to qualify one thing first. When I say drop down, I don’t mean freezing low. If you are freezing, that is a whole other problem that doesn’t involve your stabilizers. If your leverage is a little too much or you shoot with a high wrist style, you will see your sight picture sink or bounce down then back up to the middle. If you use a lot of heel in your grip or you don’t have enough tip weight, you will see lift or an upward tick as you pull through the shot. Keeping a close eye on the fine nuances of your hold pattern can help you go a long way while you are dialing in your stabilizer setup. Granted other things like draw length, form tension, and a miss set peep height can cause some of the issues I have gone through here, but they look a little different. Keep your eye out for more article posts here on www.archerylearningcenter.com. I will go over some other stability tricks that will make your bow much smoother and aim better than you ever thought possible.
Get GRIV to come to your club or national team go to www.extramiddle.com/seminar to find out more.